Showing posts with label how to. Show all posts

November 4, 2014

how to make a pinterest collage

1 + 2 + 3 + 4 + 5 (clockwise from top-left)

Pinterest is great. For just about everything. Whenever you need inspiration for crafts, blog design, fonts, birthday parties, fashion, etc.  Pinterest can help you out! It's so much fun to just scroll through oodles and oodles of inspiring images and then collect your favorites into boards.

It's also a lot of fun to share these bits of inspiration! Lots of bloggers will occasionally do posts of their favorite pins. I personally like to do these in addition to craft posts. For example, when I did my series on travel journaling.

Today I'll be showing you how you can make a simple collage to showcase your pins.

First, open up Pinterest and scroll through your boards, opening each pin in a new tab. Then, click on each image to see if it leads you to the original source. It's really important to credit your sources, so if the post you are taken to is something like "10 ideas for blahblahblah" and is a collection of posts from different websites, make sure you click on the original source. Close out of any images whose sources you can't find. For the remaining ones, go back to the Pinterest window.


Now, go through each image, right-click, and select "Save Image As...". It helps to make a separate folder for these images because having them floating around in your desktop makes your computer really cluttered!

Once you're done, open up another tab and head to Picmonkey.com. If you have never used it before, it's a photo editing website that you can use to edit photos, design graphics, and put together collages. So once you're there, go ahead and click "collage".


You'll be taken to an interface where you can drag and drop photos that you have uploaded to arrange your collage. I always like to make the background transparent because that way it blends with the background of your blog/website. You can also zoom in on photos and use pre-made layouts.

Once you're done just click save at the top of the page and head to your blog to upload it.


Now you'll need to link up the pictures. Put something along the lines of what I put at the top of this post:

1 + 2 + 3 + 4 + 5 (clockwise from top-left), or
1 | 2 | 3 | 4 | 5 (left to right, top to bottom), or
1, 2, 3, 4, 5 (clockwise from top-right)

at the top or bottom of the collage. 

NOTE: If your photos aren't arranged in a way that you can describe in a few words, then you might have to upload your made collage in Picmonkey, this time in "edit" mode, and add a number to the corner of each photo.

Then, for each picture, go to the corresponding Pinterest tab, copy the link that you found (remember, it might take some clicking to find the original source), and go back to the post editing page. Highlight the first number and click "Link" at the top of the screen (for Blogger). Paste the link, and then do this for each of the remaining photos.

All done! Now you can share your favorite pins with your readers. I hope you enjoyed this post and if you have any questions feel free to comment below.


October 20, 2014

blogging notebook

As a blogger, it's really helpful to have a place to write down all your ideas, keep track of your stats, and plan posts before sitting down at the computer to write.

I personally have two notebooks that I use for blogging. They're almost the same except that they are in different colors, one is blank, one is ruled, and one has slightly more pages. But they are the same size, which makes them easy to carry around. You may want to take that into consideration when purchasing a notebook (or notebooks).

So my first notebook, the pink one, is the one I use for important information and useful tips that I'd like to keep and look back on in the future.
At the beginning of the notebook I have my pages of ideas categorized into:

1// Craft DIYs
2// Other How To's
3// Blogging
4// Lifestyle
5// Inspiration
6// Community
7// ...and other small categories with only a couple of post-its each

I don't add post-its to it that often. What I usually do is I write down ideas in my other notebook and then set aside time to transfer all of those onto sticky notes.
When I'm working on my post schedule I can see all of my ideas categorized by topic and simply peel them off when I decide to use them.

Also in the beginning of my notebook I have a couple of pages where I've collected tips on different topics. This is really helpful because I can just flip to whatever advice I need instead of trying to remember what "that one website with all those great tips" was, haha!
Lastly, at the end of this notebook is one of the most invaluable tools a blogger can have. A schedule.

This is where I plan out what posts I will have on each Tuesday and Friday. When I'm done writing a post I can simply check it off. There's also a spot to mark if there are still additional links I need to add but can't yet because the post(s) I want to link to are not published yet.
At the bottom of each page I keep track of my stats for that month. I have:

  • total Bloglovin' followers
  • total Instagram followers
  • total Pinterest followers
  • total Google+ followers
  • views for that month only
This is super helpful and to all my readers who have blogs, I strongly suggest you do this. Not only is it motivating to see your blog grow, but it provides valuable data.

Onto my second notebook! There's actually not that much to say about this notebook because it's sort of a catch-all for ideas, rough drafts, and brainstorms. It's really nice, though, to be able to have all of my messy thoughts in one place, and all of my imporatant notes in another. In this notebook, I don't have to worry about how organized my writing is, or how neat. As long as I can read it, it's fine!
This very post started out in this notebook, which I then typed up and published, and which you are reading right now!

I hope that this post gave you ideas for your own blogging notebook(s) or inspired you to make one. Blogging is a lot more fun when you're organized!

Until next time,
Bela


October 6, 2014

typography poster


Hello there!

Typography is defined as "the style and appearance of printed matter" or "the art or procedure of arranging type or processing data and printing of it".

I, personally, would define it as "the art of arranging and combining different fonts and typefaces".

I love playing with fonts, discovering new ones, and using them! Just recently I had to create a worksheet for a school project and I had a lot of fun picking the perfect fun to use.

If you love fonts as much as I do, or simply want to make something beautiful, then consider making a typography poster!

Today I will be showing you how you can make your own typography art and hopefully inspiring you to try some new things with it.

Let's start!
You will need: paper, a pencil, eraser, black marker (or paint), a ruler, and other shape drawing materials.

First, you'll need to find an inspiring quote that you like.You can just search "inspiring quotes" online and you'll find plenty to choose from. 

Then, use a pencil to sketch your rough draft. Try arranging your words in different ways; you can always erase if you don't like it! Try using different elements like: arrows, symbols, banners, shapes, lines, etc.
Also remember to use lots of different fonts. Combine clean, modern fonts with swirly cursive fonts.

Then, go over everything with your marker, add details, and you're done!


Hang up your work of art, or share it with your friends! 


Hope you enjoyed this post,
Bela

September 26, 2014

accordion-style folder


Hello everybody!

You might know that I love reusing and repurposing things, so when we received a beautiful hardcover Gucci catalog one day, I knew I wanted to make something out of it.

I carefully pulled out all of the pages away from the glue that bonded them to the spine and snipped some strings to free them.


I decided that what I wanted to make with it was an accordion-style folder.

I had never made one, so it took some experimenting (and lots of mistakes) to come up with a good technique to share with you guys!

So let's get started. First you'll have to get something similar to the cover of my catalog. You could also take a large, heavy sheet of paper and fold it in half, or connect two pieces of cardboard with a strip of fabric.

You will also need:
  • a sheet of paper (this should be strong enough that it won't rip easily but thin enough to fold)
  • scissors
  • glue or rubber cement (I used the latter)
  • a ruler or measuring tape
  • pencil
1// Measure how far you will want your folder to open (the width between the two edges) and cut out a rectangle of paper that is about 3cm wider than that. You should make it long enough that you will be able to trim it later.


2// Now line your rectangle up with the folder, placing it about one centimeter below the opening of the folder, then use your pencil to mark the point where you will trim the paper (about half a centimeter above the spine).


3// Open up your folder to the width that it will be once you're done, and place your paper in front of it as shown. Then, go down to the very bottom and mark .5cm from each edge, like so:


4// Now cut from the corners or the rectangle to the marks you just made.

5// Trace this triangle onto your colored paper so that you can make a second of the same shape and size.


steps 6-9 apply to both triangles

6// Fold the triangle in half. Then fold up both edges halfway. Fold up the edges halfway once more. It's like making a paper airplane!


7// When you open them up, the triangles should look like this (flip it to the side that has 3 "mountains":


8// Apply glue to the outer edges (the outer edges of the 1st and 3rd mountains).

9// Now take one of your triangles and hold it so that the side with 2 mountains is facing you. This is extremely important! You will glue it in this way.


10// Glue one side of one triangle in, then one side of the other triangle. Then glue in the remaining sides. This is easier than doing it one at a time because otherwise, when you're doing the second one, you won't be able to fully open the folder.  

I then decorated my folder with circles and labeled it "inspiration" because I plan on using it to collect magazine articles and pictures that I like.


I hope you guys enjoyed this post! Thank you so much for reading!

September 19, 2014

how to make a blog header (for blogger)


Hello!

Today's post is for my readers who also have a blog. One of the most important parts of a blog is its header. If new visitors arrive at your blog and see one of those generic, boring, Blogger headers, the ones where you type in your blog name and it pops up at the top of the page, they are less likely to stay on your blog.

I know this from:
1// Personal experience.
2// Seeing that the most popular blogs have their own pretty headers.

Now I'm not saying that you need to have a header for your blog to look nice. What I'm saying is, don't leave your blog looking plain and boring. If you have your own cool design ideas that don't involve a header, awesome! If you're wondering what I'm talking about, check out Zali's blog.

But if you want to learn how to make a blog header, then let's get started!

You'll see that the header I am using as an example is from my old design. That's because I wrote this post a long time ago, haha!

First, head over to the design tab in your Blogger dashboard and click "customize".


In the design area, click "advanced" and then select "adjust widths".


Find out what the width of your entire blog is and either write that number down or memorize it. Or, you know, keep that page open and go back to it when you need that number again.

Open up a new tab and type in "picmonkey.com". Picmonkey is a really useful photo editing tool for bloggers so if you don't already use it, keep it in mind in your little "Blogger's Toolbox".


If you're uploading an image that you already created, click "edit". If you want to design your header from scratch on Picmonkey, click "design".


Either way, you have to either crop your uploaded image or resize your canvas to fit your blog. For the width, use the number that I told you to remember.


Once you've designed your header (A.K.A. Masterpiece), click "save". Save it as a PNG file to a location of your choosing.


Now go back to Blogger, select "Layout" from the Blogger dashboard and click "edit".


Upload your header and check the box that says "Replace header with image". Click the preview button to make sure it looks nice and save!


Thanks for reading! I hope you found this post helpful.

Comment below if you have any suggestions for other posts about blogging. I'd love to do some more posts on this topic!

September 5, 2014

how to organize your computer files


Hello! Today I've got some tips for organizing your computer files. I guess this is sort of related to my desk/craft/work are series because a lot of use a computer at our desk, and just because it's a computer doesn't mean it doesn't need to be organized!

Before we start, I recommend checking out Google Drive if you don't already use it. I write and store most of my text-based files on it and it has really been invaluable for working on homework and collaborating on group projects.

Let's get started!


First, create some very generic folders. For example: Blogging, Personal, and School.

For me, my school folder has by far the most files, so I'll start with that one. Inside your school folder, create a folder for each school year. When you go through each school year create a folder for each subject, then inside those folders create a folder for each big project. If it's just a short assignment then you might want to file it away into a folder like "Poem Assignments" or "'Name of Book' Weekly Responses".

Here is an example of what your folders might look like:


As for the personal folder, to me that's just a folder where I put things that aren't related to school or blogging. So I just make folders as I go along. For example, if I'm throwing a party and I have some files (invites, ideas, shopping lists), I can make a folder titled "Party Planning" and give each party its own folder.

If you're a blogger you can put all of your posts, lists of ideas, and design elements into the blogging folder. In your design elements folder create some folders like "Headers", "Sidebar Buttons", "Social Media Buttons", etc., so if in the future you want to go back to an old design you can easily find exactly what you need.

As for photos, it's up to you how you want to sort them. When I upload photos to my computer they are sorted by the day they were taken and I just leave them like that, but you could sort them by event to be more organized.

The most important thing to remember is to stick to your organizing system. Always put files in their proper place. You will thank yourself later.

That's all for my tips!

Thanks for reading!

August 31, 2014

how to make mini notebooks


Hello! Today I've got another DIY for you! I've decided to show you guys how to make mini notebooks. You can use them for taking notes, drawing little illustrations, taking down quick ideas on-the-go... Or you could come up with a really unique use for them. Maybe you could turn one into a unique birthday card for a friend, or, if you friend is the crafty/writer type, give them a stack of these notebooks tied up with a cute ribbon and let them decide what they'd like to do with them. Maybe you could use notebook for each book you read to write down memorable quotes. You can really do anything.

Anyways, let's get started! For this project you will need:


Colorful paper, blank paper, string, a needle, and some magazine pictures.

First, cut your blank paper into small sheets. I use regular printer paper and I like to cut each sheet into four pieces. Of course you could make yours smaller or bigger.


Fold all of these sheets in half and stack them.

Now trace and cut out a cover sheet from the colorful paper. Fold that in half and put it on the bottom.


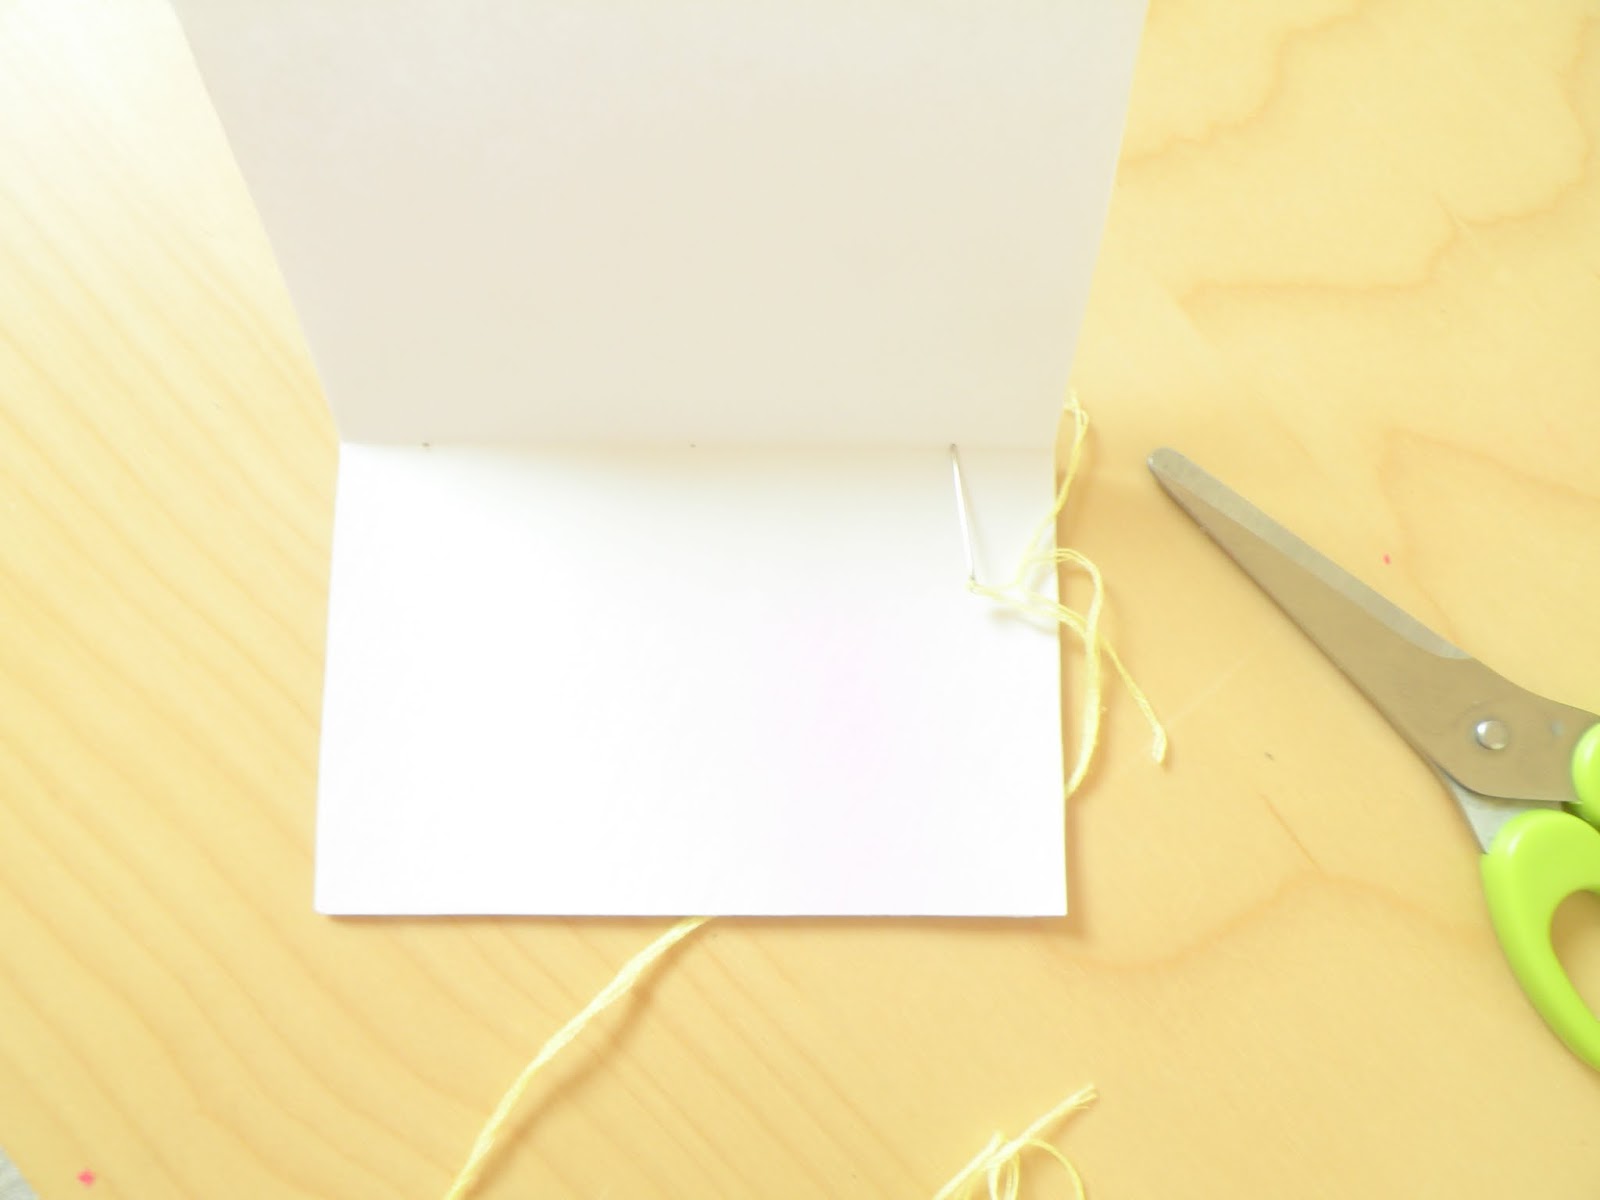
Take a needle and pole two holes through the middle of these sheets of paper.

Grab your string, tie it onto your needle, and weave it through both holes, like so.


Tie it up, decorate the cover, and you're done!


Comment below and share any ideas you have for using these notebooks!

Thanks for reading!

August 29, 2014

how to organize and decorate your desk area


Hello there! Summer is almost over, which I'm sad and happy about at the same time. I've already gotten all of my school supplies, before we left on our trip, actually, because as soon as I get home I'll be off to school. During this time there's a lot of organizing to be done to get ready for the homework and projects that you'll have to do during the school year. So I thought that this would be the perfect time to write about organizing and decorating your work/craft space (if you're a crafter). This is going to be one of the longest posts I've ever written. Maybe the longest!

Let's get started!

1// First prepare yourself. By this I mean find a good time during your week/day to tackle this project. I prefer doing cleaning and organizing projects in the morning because I'm more energized. Open the windows for fresh air, maybe put on some music, etc.

2// Go on Pinterest to find some inspiration. Look up something along the lines of "desk craft area" and create a board to organize all of your pins. You can also check out my post on craft space inspiration or take a look at my full Pinterest board. Also check out these inspiring room posts from Vanilla Craft Blog and A Little Birdy Blog. Just make sure you stay on task and don't start browsing through unrelated posts (It's tempting, I know)! Once you've collected all of your ideas, move on to step 3.


3// Get a piece of paper and take a good look at all of the images you collected and write down what from the image inspired you. Write down everything and anything. Of course, if you found come articles or tutorials, you can simply write the names of those down. Leave some space between each idea.


4// Below each idea, brainstorm how you could incorporate that idea into your space. If it's not possible, just cross the idea out. Write down what materials you could use, where you could find them, what color you would switch up, etc.

5// Now it's time to start cleaning! First, find a place in your room where you have lots of space to temporarily store everything that's in and on your desk. Completely clear your desk. If you have any containers full of knick knacks, dump it out. Pick up anything that's on the floor and put it in the pile.

6// Now take a look at everything in you pile and remove any scrap pieces of paper, old markers and pens, unfinished projects, supply packaging, etc. Sort that stuff into recyclables and non-recyclables and toss it out. Take the things you want to keep but do not want in your desk area and put them away. It's important to make sure your desk area is uncluttered, so if it makes more sense to put something on a shelf at the other side of your room, do that.

7// Wipe down your desk, drawers, cabinets, shelves, everything. Vacuum and/or sweep the floors. You might have to slide out your desk to clean the hard-to-reach areas.

8// Now take a look at what is left in your pile and either in your head or on paper decide what you'll group together and where you''ll put everything. Keep accessibility in mind. If your desk has drawers on one side, put most of your stuff on that side so you have more space to work on the side where your chair will go.

9// Once you've got your plan, put each item in its place, cleaning dusty or dirty items as you go with a damp washcloth. If you don't have enough pencil cups and little boxes in your room, look around your house for things you could use as containers. My dad helped me find a white shoebox and I decorated it by gluing a drawing of mine on top.


10// Now grab all of your papers and figure out a system for sorting them. Will you stack them in a pile, put them in folders, what categories you will have (blogging, school, drawing), etc... I personally don't keep any school papers on my desk, but if you do then you could make a folder for that. Also remember to have some blank pieces of paper on hand.

11// All done! With the cleaning and organizing that is. Now it's time to decorate. Take a look at all of your ideas and decide, now that you can see what your newly-organized desk looks like, what color scheme you want and which areas of your space need the most work.

12// Now it's up to you and your creativity! I can't really tell you step-by-step how you should decorate because it's all up to your individual style. I can give you some tips, though. I'll give you two. First, your style is your style. If your desk area doesn't look like that of someone else's, that's absolutely okay! As long as your space makes you happy, it's perfect. Secondly, don't worry if you feel like you don't have enough decorations. You can decorate your desk area slowly as you discover pretty things that you think go with your desk style.


13// Once you're done for the day you can spray some air freshener and pat yourself on the back. You can now enjoy your organized space!

Good luck with your own organizing projects!


Thanks for reading! Have a lovely day!

P.S. I cut out that picture from a magazine. Wouldn't it be great to just be walking and find "Have a Lovely Day" written somewhere?